Today, to start a Vue 3 project, you can simply run npm init vue@3 in the command line.
You’ll then go through a few prompts. After choosing what features you’d like to include, a new project will be ready in seconds.
It’s so smooth and straightforward.
So, what’s the magic here?
the create-vue package
npm has the npm init <initializer> command that will automatically download a corresponding create-<initializer> package and execute it.
We believe it'll be the easiest way for one to run a project scaffolder as npm is available on most front-end developer’s machines
Only one caveat: remember to add a version string after the initializer name (like vue@3); otherwise, npm may end up using a cached outdated version of the package.
As npm downloads create-vue on the fly, we would like to make it as small as possible to speed up the downloading process.
So, firstly, we use as few third-party dependencies as possible. They need to be lightweight, too. In the end, create-vue uses only 3 dependencies: minimist for simple command-line argument parsing, prompts for the interactive prompts, and kolorist for output colorization.
Then, we use esbuild to bundle and tree-shake these dependencies.
By doing so, we can skip the package resolving process for these dependencies. Not only does it reduce network traffic, but it also avoids the request waterfall.
The result is quite satisfying: executing npm init vue@3 only costs less than 100KB in 2 requests (one resolves the latest version, the other downloads the package tarball). Much smaller than the size of an average web page in 2021.
It even supports offline mode:
npm init vue@3 --prefer-offline could work after the network connection is lost, as long as you’ve previously run npm init vue@3 successfully.
the folder structure
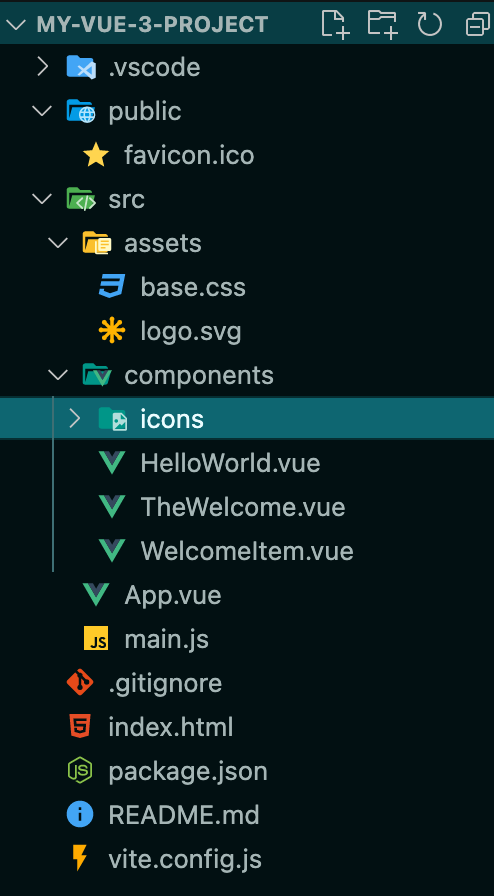
Let’s start with the bare-bone project template (Choosing “No” for every question or npm init vue@3 -- --default):

Note: you can see all the possible outcomes of different combinations of choices at https://github.com/vuejs/create-vue-templates
vite.config.js
We choose Vite as the default dev server and bundler for new Vue projects, because we believe it provides the best out-of-box experience.
Vite is framework-agnostic. So for a Vue project, we need to enable the vue plugin in the configuration file. Thus the vite.config.js file.
@vitejs/plugin-vue-jsx is an opt-in choice, though. Because the plugin depends on babel, thus would slow down the dependency installation and project compilation a little. It should only be added when necessary.
Aliases - we’ll talk about that in a later article.
public/ directory
The public directory is for static files, those whose URLs won’t change after bundling.
index.html
In Vite, index.html serves as the entry point of the application, so it is in the root directory instead of public/.
With a few extra keystrokes, you are also able to set up a multi-page app with multiple .html entry points in Vite: https://vitejs.dev/guide/build.html#multi-page-app.
src/ directory
src/ is where the project source code lives.
Previously in Vue CLI, this directory is mandatory, otherwise, you may run into issues with all kinds of plugins.
In Vite, it is no longer mandatory because source code entries are specified in the index.html as script type="module" src="./src/main.js".
But we still strongly recommend you to keep putting all project source code inside src/.
A shared convention in the community would be easier for tooling and knowledge sharing.
__tests__/ sub-directories
If you answer yes to “Add Vitest for testing” or “Add Cypress for testing”, you will see a __tests__/ directory inside src/components.
Inside that directory is a HelloWorld.spec.ts file, which contains test cases for the HelloWorld.vue component.
Unit tests, unlike end-to-end tests, are often testing specific components or modules. Therefore it makes more sense to put them alongside their corresponding source files.
Meanwhile, we don’t want them to be too conspicuous when viewing the project’s folder structure, so we put them in a sub-directory instead of listing directly.